compare tattoo sizes
Updated
The Ombra Tattoo team · Written by the Ombra product team — practical guidance for planning tattoo ideas, placement, and cover-up questions.
To compare tattoo sizes fairly, place every version on the same unedited body photo, keep its center and orientation fixed, and change only the footprint. Include a joint or other body landmark so scale remains readable. Review each version close up and at normal viewing distance, then take the preferred range—not a supposedly exact measurement—to a tattoo artist for technical sizing.
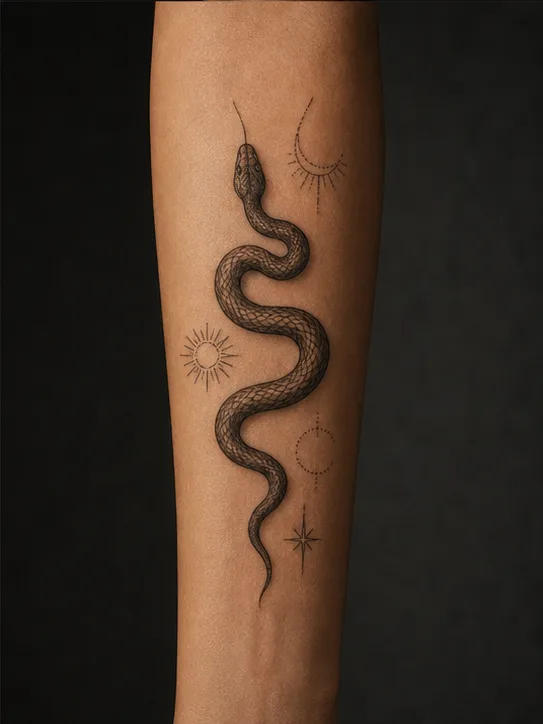
A design can look balanced as an isolated image and feel wrong once it sits on a real arm, calf, shoulder, or back. Size changes the relationship between the tattoo, nearby joints, the body's natural axis, and the amount of clear skin around it. The useful comparison is not which enlarged image looks most detailed on a screen. It is which footprint reads naturally on the intended surface and still gives the artist enough room for the essential shapes.
Compare sizes step by step
Take one scale-friendly source photo
Use soft even light, hold the camera parallel to the placement, relax the body area, and include nearby landmarks such as the wrist, elbow, ankle, knee, or shoulder line. Avoid an ultra-wide lens and a tight crop. The landmark is not a precise ruler, but it keeps every version tied to the same visible body context.
Choose one design version
Do not compare a small minimal drawing against a large ornate redesign and call that a size test. Use the same silhouette, detail level, and orientation first. If the source design changes between versions, you may be reacting to composition rather than footprint.
Fix the center and direction
Anchor the design to one repeatable point and keep its vertical or horizontal axis stable. On a forearm, for example, align it with the limb rather than rotating every version to fill more space. Moving and resizing together makes the comparison difficult to interpret.
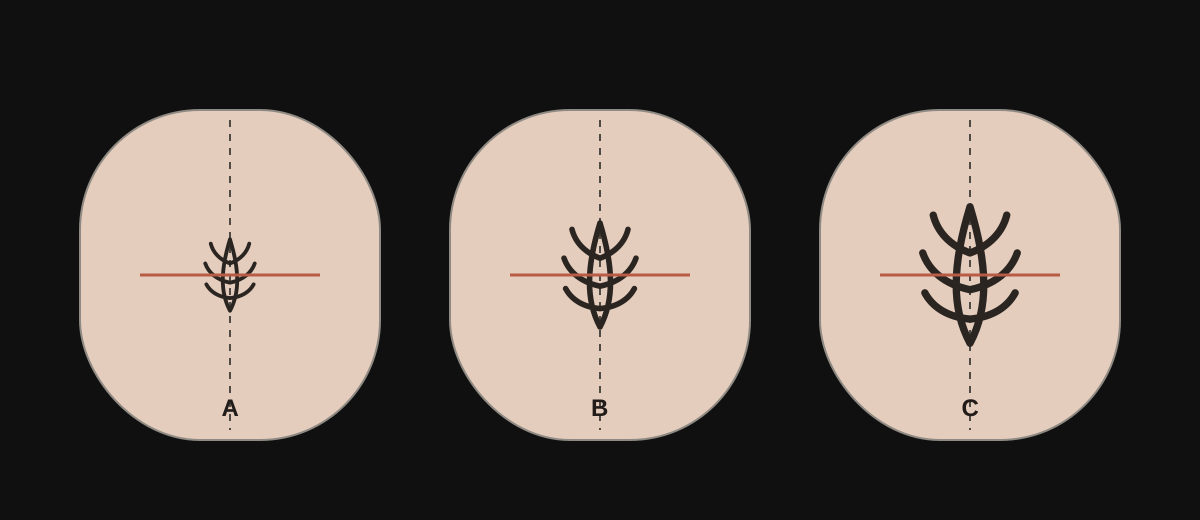
Create a small, medium, and large range
Make three meaningfully different footprints instead of many nearly identical versions. Keep enough clear skin around each one to read the outer silhouette. The labels are relative to your photograph; they are not standard tattoo sizes or a substitute for centimetres measured in person.
Check the design from two distances
Zoom in to inspect whether key gaps and features remain visible, then return to the size at which the limb would normally be seen. A tiny design can look perfect when enlarged on a phone but lose its identity at ordinary distance. A large version may read well yet dominate more of the body area than you want.
Bring a preferred range to the artist
Save the original photo and all three comparisons. Tell the artist which version feels closest and where you are flexible. Ask what minimum size protects the line spacing and whether the composition should be simplified, extended, or shifted for the actual anatomy.
Use body landmarks without pretending they are exact measurements
A visible wrist or elbow helps the eye understand scale, but photographs still contain perspective. The part closest to the camera appears larger, and curved areas turn away from view. Do not calculate a stencil size from pixels or assume the preview preserves centimetres. If exact dimensions matter for a quote or placement, measure the body area and let the artist confirm it in the position used for tattooing.
For wrapping designs, use a straight primary view plus one consistent side angle. A single flat preview cannot show how much artwork disappears around the limb. Compare where the main focal point remains visible and let the artist design the continuation; duplicating or stretching a flat image around a curved body is not a reliable plan.
Compare tattoo footprints on your own photo → Get the appCompare one decision at a time
Once the footprint range is clear, test placement or orientation in a separate set. Keep the chosen size fixed while moving the design slightly higher, lower, inward, or outward. This produces a useful record: one group answers how large, another answers where. Mixing every variable into a gallery of unrelated previews creates more options but less evidence.
Keep a comparison record beside the images: source photo name, motif version, fixed center landmark, relative footprint, viewing distance, and the one trade-off you noticed. For example, the small version may leave more future space but lose a gap at normal distance; the large version may read clearly but cross your preferred boundary. Record those observations as choices, not as measurements the app has verified.
Ombra Tattoo is free to download and can help you place a tattoo direction on your own photo in the app. Save only the versions that teach you something, and bring the clean source photo too. Your artist can then understand the preference without mistaking the preview for a final technical drawing.
FAQ
How many tattoo sizes should I compare?
Three clearly different footprints are usually easier to judge than many near-duplicates. Use the same design, center, orientation, and source photo for each.
Can I measure tattoo size from a photo?
A photograph can support rough proportion comparisons, but perspective prevents dependable pixel-to-centimetre sizing. Measure in person and have the artist confirm the final stencil.
Should the smallest tattoo keep every detail?
Not necessarily. If important gaps disappear, the artist may recommend a larger footprint or a simpler drawing rather than compressing the same detail.
How do I compare a wraparound tattoo?
Use a primary straight view and consistent side angles, keep the focal point stable, and let the artist design how the composition continues around the curved surface.
Does a try-on show how the tattoo will age?
No. It shows an illustrative placement direction. Line weight, spacing, technique, skin, exposure, and aftercare affect the real tattoo over time.
Related guides
Ombra Tattoo
Preview ink on your own skin